Cake Mix Tutorial

It's been a while since I've done a tutorial, and when our Moda rep showed us this awesome new product they were releasing I just knew that this was the perfect tutorial post! She was even kind enough to leave a sheet behind for me to try, and it worked beautifully!
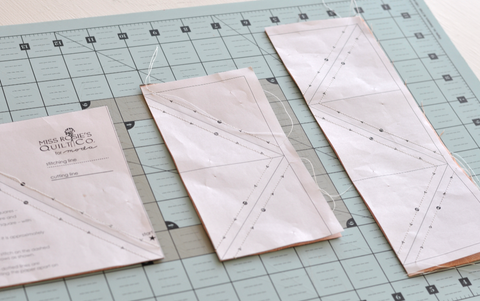
It's called a Cake Mix Recipe Pad, and it's a pad of these printed pages. This technique is almost like paper piecing / foundation piecing but much easier to understand and follow, so if you've never paper pieced before there is nothing to worry about (I know you can do this!)
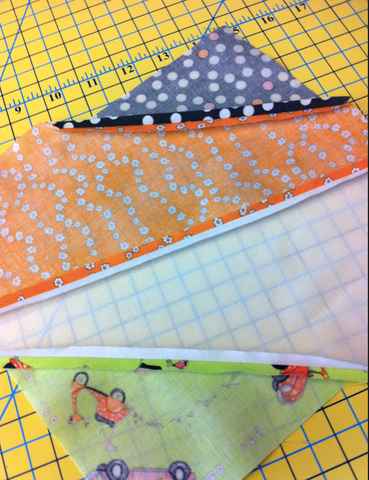
1. Pick out two 10" x 10" blocks, I used what we had on hand and made sure there was enough contrast between the two

2. Place the fabric right sides together, the paper on top with the print facing up (you'll stitch on this), and pin in place

3. Look for the star that says "start", this will be where you start stitching on the dotted lines
** TIP: you can shorten your stitch, or you can stitch on the dotted lines with no top thread and no bobbin to make them perforated so they are easier to tear the paper off **

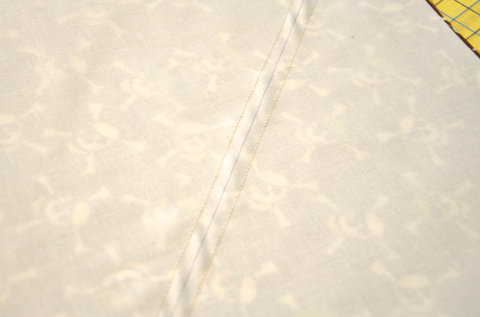
4. Can you believe that's basically it? Just keep stitching on the dotted lines until you have no more dotted lines unstitched

5. Once you have followed the stitching line all the way around (making sure you have no dotted lines unstitched)

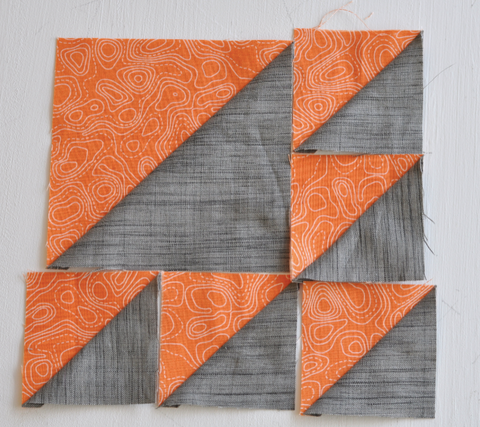
6. Cut on the solid lines
7. You will have small two large squares and ten small squares. Peel off all the paper (this is where either pre-stitching or using a smaller seam allowance is very helpful!)

8. Tear off the paper and press (no squaring up necessary!!)

9. Decide on the layout you would like to use (they have plenty of examples in the Cake Mix pattern)
10. Sew your blocks together

11. That's it! One Cake Mix Recipe page, two 10" x 10" blocks of fabric made two of these blocks measuring 7 1/4" x 7 1/4"
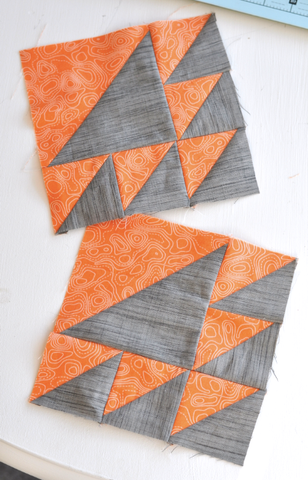
Can you imagine how fast a quilt would go together using this technique? 
Details:
Cake Mix - Each Cake Mix Pad with 45 recipe cards will make 450, 2-1/4" x 2-1/4" finished half square triangles and 90 4-1/2" x 4-1/2" finished half square triangles.
Check out our assortment of Layer Cakes to make this fun project!
Selvage Coasters - A Quick How To
Ever wonder what to do with your selvages? I was in desperate need of some coasters, so I thought why not make them a little interesting!

Here's a quick and informal tutorial on how to use your selvages to make coasters. I began by taking some scrap fabric or muslin and cut them into 5" squares.

Take a ruler, line up the 45 degree line with the corner of the 5" square. Mark with a pen (I used a Frixon pen, but you could use something permanent since the selvage will be covering up the line).

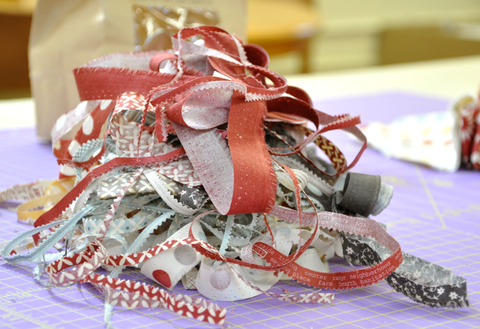
Grab a handful of those selvages you've been hoarding (come on, no point in denying it....). I only used 7 or 8 different strips, they stretch surprisingly far!

Place the first selvage aligning the top with the line you just marked.

Place the next selvage above the first selvage (both selvages facing up), overlapping slightly so that when the top stitch line is sewn both selvages are sewn down. Stitch close to the edge of the lower portion of the second selvage.

Continue to layer the next selvage in line slightly above the selvage just sewn, stitch close to the edge making sure both selvages are sewn down with that stitch line.

Continue until the whole square is completely covered with selvages. Here is a picture of the front and back. That's it, now all you have to do is cut them into the desired size (I used a final size of 4.5" x 4.5"), make a quilt sandwich with backing and batting, quilt as desired and bind!

Who couldn't use some new coasters?? I know I did!
Jenn
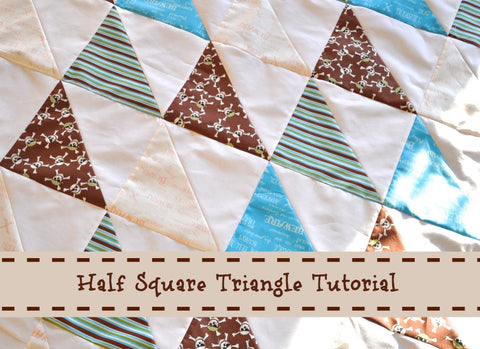
Half Square Triangle Tutorial
I'm sure almost everyone out there in the quilting world already knows how to make a half square triangle block. There's nothing fancy to making one, but they are in oh so many beautiful blocks! So if you don't know how to make them, today is your lucky day! I was making another quilt to add to the collection for our Charity Quilts, and thought a half square quilt would be a really quick and easy quilt to make. Here's a quick tutorial on how to make half square triangle blocks.
Details of our quilt:
Size: 43" x 52"
We used four different colors (if you like the fabric we used, it's called Pirates by Riley Blake, such a cute boy quilt fabric which can be so hard to find sometimes!)
Colored Blocks: One 10" strip WOF (width of fabric) of each four colors. Cut these into 10" x 10" blocks, you will have a total of four 10" x 10" squares of each color.
Background Blocks: 1 1/4 Yard. Cut 16 10" x 10" squares.

- Mark a diagonal line down the center of the background blocks.
- Sew a 1/4" seam down both sides of the line you just marked.

- Cut on the center line.

- Press the seam towards the dark fabric.

- Align the diagonal line of ruler on the diagonal sewing line, trim the top and right side of the block.

- Flip the block to trim the other two sides, we trimmed our block down to a 9" block.

There you have it, it's that easy to sew and trim half square triangles! Now you just need to decide on your quilt layout, which may sound easier than it really is with all those choices... diamonds, chevron, diagonal lines... so many layout choices!
Jenn
Wonky Block Tutorial
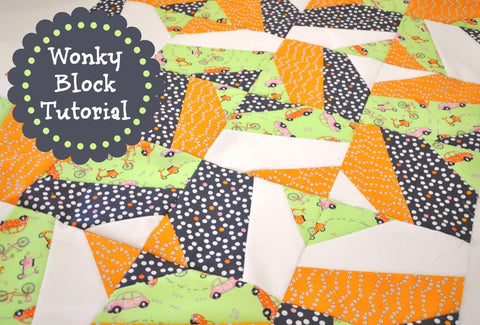
I love making these wonky blocks for quick baby quilts and charity quilts! So here's a tutorial on how I make them.
What you will need to make the featured 31" x 46" quilt:
- Fabric - 10" x WOF (width of fabric) of six different colors
(we used four colors, cut 20" x WOF and this made two of these quilts!)
- Rotary Cutter
- Ruler
- Coordinating Thread
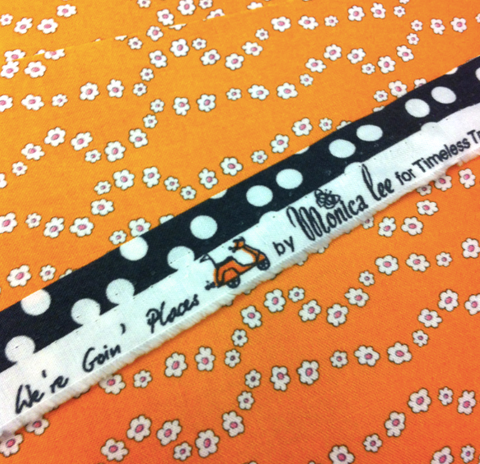
* Featured fabric is Now We're Goin' Places by Monica Lee (excuse all my iPhone pictures)
Step one: Cut 24 10" x 10" squares.
Step two: Layer four 10" x 10" squares in a stack.

Step three: Lay ruler at an angle,
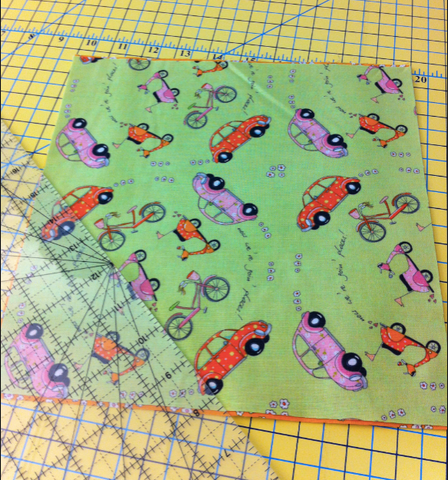
Step four: Cut so there are four sections.

Step five: Place cut pieces in desired layout (we selected to have one color in each block, you could always double up on colors too!)

Step six: Sew cut pieces together and press seams open.
Step seven: Block will have jagged edges from the cut angles. Square up block, we started with 10" x 10" square, our squared up block measures 8.5" x 8.5".

Step eight: Place blocks in desired arrangement.

Final quilt should have four blocks across and five blocks down if you are using the 24 10" x 10" blocks.

Hope you enjoy making them as much as I do! We would love to see some pictures of ones you make, find us on facebook or e-mail us at admin@quiltedthimblecottage.com
Jenn
Baby Gift Label Tutorial
I made the cutest little baby gifts the other weekend from these labels and thought I would post a quick tutorial.

So here's what you need:
- 1 panel of labels (I used the Odds and Ends panel
- Heat and Bond (enough to fit your label)
- Item to applique your labels on (onsies, cloth diapers and a bibs are all great for these)
- Coordinating thread
Here are the adorable labels I used from the Odds and Ends line.

Start by cutting out which label you want to use.

Cut around the label so just the inner border is remaining.

Measure the label, cut the same size of Heat and Bond. Apply the Heat and Bond to the wrong side of the label by following the manufacturers directions.

Once the Heat and Bond is ironed on, trim all the excess Heat and Bond away so the label is clean around the edges.

Remove the Heat and Bond paper off the back, place on the item you want to appliqué. Press with the iron following Heat and Bond manufacturers directions.
Stitch around the edge of the label, I used a coordinating brown thread and a tight zig zag stitch.

Pull the tales to the back and knot.

And just like that you're done, baby gift ready to go! Hope you enjoy!
Jenn
Quilt as you go Technique
We are doing a small casserole carrier for an upcoming class and thought it would be helpful to write a post about the "quilt as you go" technique. So here is what you will need for supplies:
Batting
Backing
Strips - jelly rolls are very convenient for this process! (but varied widths work just as well)
Coordinating thread (the thread will only show up on the backing)
Walking Foot
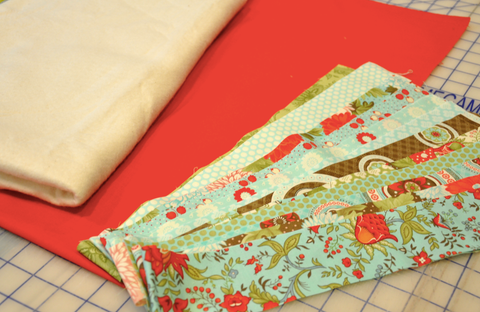
Here is the fabric we have selected, batting, backing and strips.

Fabric is the lovely Bliss by Bonnie and Camille.

Lay backing with wrong side up, place batting on top of backing. We have our batting slightly larger than our backing to allow for any shrinkage during quilting.

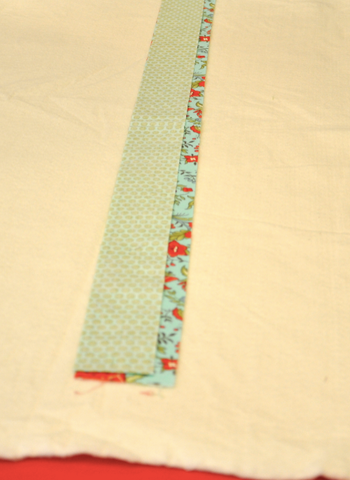
Find the middle of your backing, place one strip of fabric directly in the middle right side up.

Place the strip that will be featured next to it, right sides together.
Here is another view. Right sides together, ready to be sewn.

Pin in place to prevent shifting during sewing.

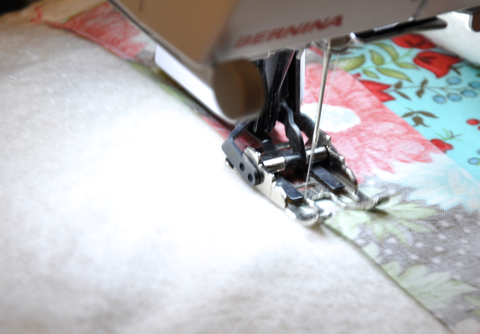
Sew with right sides together, 1/4" seam allowance. We recommend using a walking foot, this has multiple layers of fabric and the walking foot will prevent shifting as you sew.

We placed a pin at the top of the quilt to know which side we began sewing on, with each strip you add you want to start on the opposite end of your last strip. This prevents pulling and shifting when quilting, making it more even.

Open strips, quickly press open with the iron making sure not to let the iron stay in one place to long.

Continue with placing your next strip right sides together to the strip just sewn.
Stitch a 1/4" seam allowance, remember to start from the opposite end of the previous strip. (Opposite end from where you placed your marking pin)

Press open, repeat steps until all your strips have been sewn on one side.

Begin sewing your strips on the opposite side. Place right sides together, pin, sew 1/4", press open and repeat until the other side of strips are finished.

Trim down and as your pattern requires.
And there you have it - all strips have been quilted as you go!
Half Square Quilt Using a Moda Scrap Bag Tutorial
Moda is so clever, they release these awesome little Scrap Bags that give you a huge bang for your buck. Basically, Moda Scrap Bags are often the remnants of Moda precuts such as Layer Cakes and Charm Packs. Scrap bags have approximately 25 to 30 color coordinated 32" by 2" to 4" wide selvage strips of all cotton fabric. There is approximately a 1/2 pound of fabric in each bag.
![]()
I had a Hometown Scrap Bag in my collection for a little while now and thought it was time that I dug into it (actually I am obsessed with using Hometown in whatever project I can in case you didn't know...). A lot of people aren't sure what to do with the Moda Scrap Bags or the sheer potential of them so I wanted to share what I made with mine. I only used one Moda Scrap Bag and some Bella White for the background and Hometown fabric for the inner and outer borders. Yes, a quilt of this size used one, I repeat ONE Scrap Bag priced at $10.95 with some background and border fabrics! Fabulous...

Quilt Details:
Fabric: Hometown by Sweetwater for Moda
Batting: Wool by Quilters Dream <I love using wool batting!>
Thread: So Fine 401 (white)
Quilting Design: Swirling Feathers
So here we go -
Supplies needed:
- 1 Moda Scrap Bag (Hometown Scrap Bag)
- 2 1/4 Yards of a solid for the background (Bella Bleached White 9900-97)
- 5/8 Yard for Outer Border (Town Square in Sky 5460-13)
- 1/3 Yard for Inner Border (Market Place in Concrete 5467-25)
- 1/3 Yard for Binding (Preppy Plaid in Stop Sign 5466-12)
Tools:
- Ruler
- Rotary Cutter
- 90 degree ruler

Begin by laying your fabric out so you can see all the colors your working with.

Take each strip individually and cut off the selvage edge.

* Cut these the largest the strip will allow. Each strip can differ from 1" to 4" in width, don't worry about cutting the lengths the same size.
Step back and admire all the hard work on trimming you have done!

I sorted my strips in three different stacks, a small strip, medium strip and large strip stack.
Begin with matching the small to the large, when the smalls/or large strips run out (this will depend on the strip sizes your scrap bag came with), pair what is remaining to the medium strips.
* This is where you will want to match the colors together for the strips that your blocks will be made from, some colors play better with others. One other thing to note, there may be a strip or two that won't offer enough contrast with your background. I had two solid creme strips I left out due to them blending with the background and not giving the half square effect.

Sew the pairs of strips together using a 1/4" seam allowance. Measure the all the strip sets widths, note the smallest width strip set and cut all the other strip sets to that size. The smallest set I had was 3.5".
Cut your background color in the smallest strip set width, matching the quantity of strip sets you have.
In my quilt, all my strip sets were cut down to 3.5" by width of fabric (I did not trim the length), I had 20 strip sets. So I cut 20 - 3.5" strips out of my background material.

Placing right sides together of one strip set and one background piece, sew 1/4" seam allowance on both edges making a "tube".
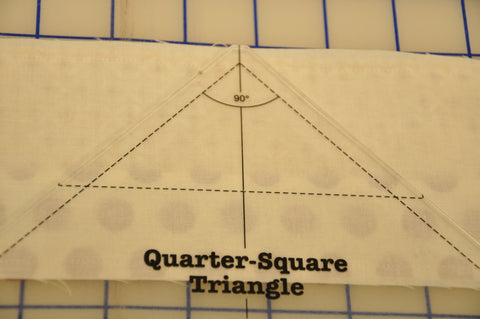
Line the 90 degree ruler tip to the top edge of the fabric. Rotary cut on the right side and left side against the 90 degree template ruler.
Set the triangle aside that was just cut.

Flip the strip over, matching the 90 degree ruler edge to the edge of the strip that was just cut.
Cut the left side, making another triangle. Repeat these steps until no more triangles can be cut.
I was able to squeeze five triangles out of each strip, only four are needed for this quilt since they will be sewn in pairs. I kept my scraps and made a cute little table topper.
Repeat steps above to all tube strips.

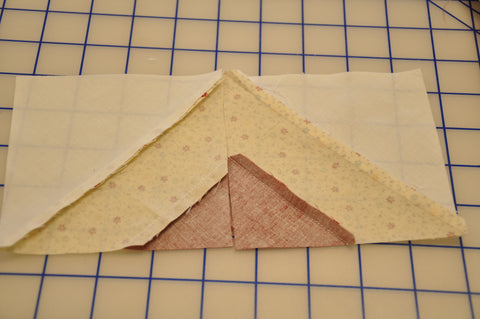
Here comes the counter intuitive part, take the seam ripper and take out the top few stitches in the tip of the triangle (I probably had 4-5 stitches to take out of each triangle)

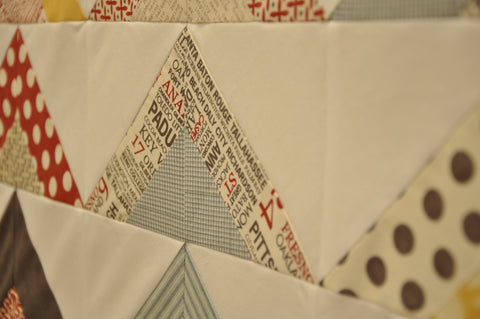
Open the triangles, and you have your blocks! I love seeing progress!

Match the left side to the right side and place each block in a stack.
Pressing technique - press seams in opposite directions so seams can "lock" together when blocks are sewn together. Make sure each stack is consistently pressed the same direction so the blocks continue to lock seams. Looking at the stack with fabric facing up, my left side stack was pressed towards the background fabric, and my right stack was pressed away from the background fabric.

Now that the blocks are pressed and will lay flat, square up the blocks so they are all the same size. I squared all my blocks to 4.5".

Match seams, locking in place, pin and sew. Repeat for all block sets.

Lay the blocks in a pleasing pattern. I was able to get 5 blocks across and 12 blocks down.
Sew the the blocks together in rows, followed by sewing the rows together.
Sew the inner border and outer border.

Quilt as desired. Besides putting on that pesky binding, your quilt is now finished!
Jenn